Have you ever experienced the sinking feeling of seeing your child's favorite bounce house deflating before your eyes? Imagine the excitement of a birthday party or a fun-filled gathering suddenly dampened by the sight of a sagging inflatable. It's a scenario that can turn any joyful occasion into a stressful situation. But fear not! With the right knowledge and tools at your disposal, you can quickly and effectively patch up that bounce house, restoring it to its former glory in no time. Let's explore the step-by-step process of patching a bounce house, ensuring countless hours of bouncing bliss for your little ones.
Keynotes:
- Identify patch area: Visually inspect, perform soapy water test, listen for air leaks.
- Patching process: Clean area, apply adhesive, place patch, allow to dry.
- Maintenance tips: Inspect regularly for wear, store properly, consider maintenance costs.
Preparation Before Patching
Before diving into the patching process, it's essential to assess the damage and gather the necessary materials. Begin by thoroughly inspecting the bounce house for any punctures, tears, or loose seams. This step is crucial whether you're a first-time owner or considering buying a bounce house, as it ensures you're aware of any existing issues before attempting repairs.
Once you've identified the damaged areas, gather the following materials:
- Patch kit (including patches, adhesive, and applicator)
- Cleaning supplies (soap, water, and cloth)
- Scissors
- Marker or chalk (for marking the damaged areas)

Identifying the Leak Before Patching
Before patching your bounce house, it's essential to find the leak's precise location. Follow these steps:
- Visual Inspection: Look for tears, punctures, or stretched areas.
- Soapy Water Test: Inflate the bounce house and apply soapy water. Look for bubbles indicating the leak.
- Listening for Hissing Sounds: Inflate the bounce house and listen for escaping air.
Once you've found the leak, mark the area and proceed with the patching process.
Choosing the Right Patch Kit
When selecting a patch kit for your bounce house, consider factors such as the size and location of the damage, as well as the material of the bounce house. This is especially crucial for those starting a bounce house business, as the quality of repairs directly impacts customer satisfaction and the longevity of your equipment. Patch kits come in various sizes and adhesive strengths, so choose one that best suits your needs and aligns with the standards of your business.
There are two main types of patch kits:
- Vinyl patch kits: Ideal for repairing tears or punctures in vinyl bounce houses.
- Nylon patch kits: Designed for repairing nylon bounce houses or areas where flexibility is needed.
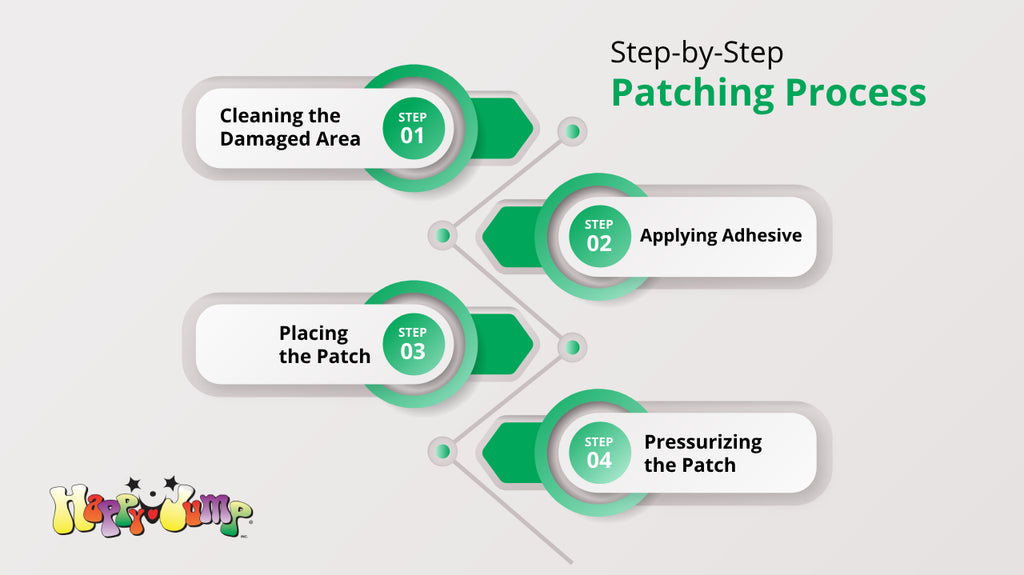
Step-by-Step Patching Process
-
Cleaning the Damaged Area
Start by cleaning the damaged area of the bounce house with soap and water to remove any dirt or debris. Allow the area to dry completely before proceeding. -
Applying Adhesive
Apply a generous amount of adhesive from the patch kit to the damaged area, ensuring full coverage. Spread the adhesive evenly with the applicator provided. -
Placing the Patch
Carefully place the patch over the damaged area, pressing down firmly to ensure a secure bond. Smooth out any wrinkles or air bubbles to create a tight seal. -
Pressurizing the Patch
Apply pressure to the patched area by pressing down firmly with your hands or using a roller. This helps to ensure proper adhesion between the patch and the bounce house material.
Allowing for Proper Drying Time
After patching the damaged area, it's crucial to allow sufficient time for the adhesive to dry completely. Avoid inflating the bounce house until the patch is fully dry to prevent displacement or weakening of the bond.
Patience is key during this step, as rushing the drying process can compromise the effectiveness of the patch. Depending on the adhesive used, drying times may vary, so refer to the instructions provided with your patch kit for guidance.
Testing the Patch
Once the patch has dried completely, it's time to test its effectiveness. Inflate the bounce house to its full capacity and inspect the patched area for any signs of leakage or instability.
Perform a thorough visual inspection, paying close attention to the patched area for any wrinkles, bubbles, or signs of lifting. Additionally, gently press on the patched area to ensure it remains securely bonded to the bounce house material.
Additional Tips for Maintenance
In addition to patching any damages, there are several steps you can take to prolong the life of your bounce house:
- Conduct regular inspections for signs of wear and tear, including loose seams, fading colors, or damaged netting.
- Store the bounce house properly when not in use, preferably in a cool, dry area away from direct sunlight and harsh weather conditions.
- Consider the bounce house cost when investing in maintenance materials and repair kits. While it's important to prioritize safety, being mindful of expenses can help you make informed decisions about the upkeep of your inflatable attraction.
Conclusion
Patching a bounce house is a straightforward process that can be done with the right materials and a bit of patience. By following the steps outlined in this guide and maintaining a proactive approach to upkeep, you can ensure your bounce house remains safe, functional, and enjoyable for years to come.
FAQs
How often should I inspect my bounce house for damages?
It's recommended to inspect your bounce house before each use and perform a more thorough inspection every few months, especially if it's used frequently.
Can I use duct tape to patch my bounce house?
While duct tape may provide a temporary fix, it's not recommended for long-term repairs as it may not adhere well to the bounce house material and can deteriorate over time.
What should I do if my bounce house develops a large tear or rip?
For larger damages, it's best to consult a professional repair service or contact the manufacturer for guidance on proper repair procedures.
How long does it take for a patch to dry completely?
Drying times vary depending on the type of adhesive used and environmental conditions. Refer to the instructions provided with your patch kit for specific drying guidelines.